I have a fondness for t-shirts of all kinds of artistic directions, from pop culture to abstract imagery to designs featuring my favorite pro-wrestlers. Of course I can only wear so many shirts, some no longer fit, and some I hesitate to wear because I’ve had the wonderful opportunity to get them signed, etc. A few years back I came across a great idea for turning such t-shirts into wall art using canvas stretchers. I loved the results and it’s become a hobby of mine, and made several “framed” t-shirts to adorn my walls.
For anyone who may be interested I thought I’d share how, demonstrating with a fun design I picked up to help Cherry Bomb with medical expenses from a recent shoulder injury (which she is thankfully recovering well from), and was lucky enough to get signed at the recent Shimmer tapings. The process is straightforward, just takes a little patience … and a staple gun.
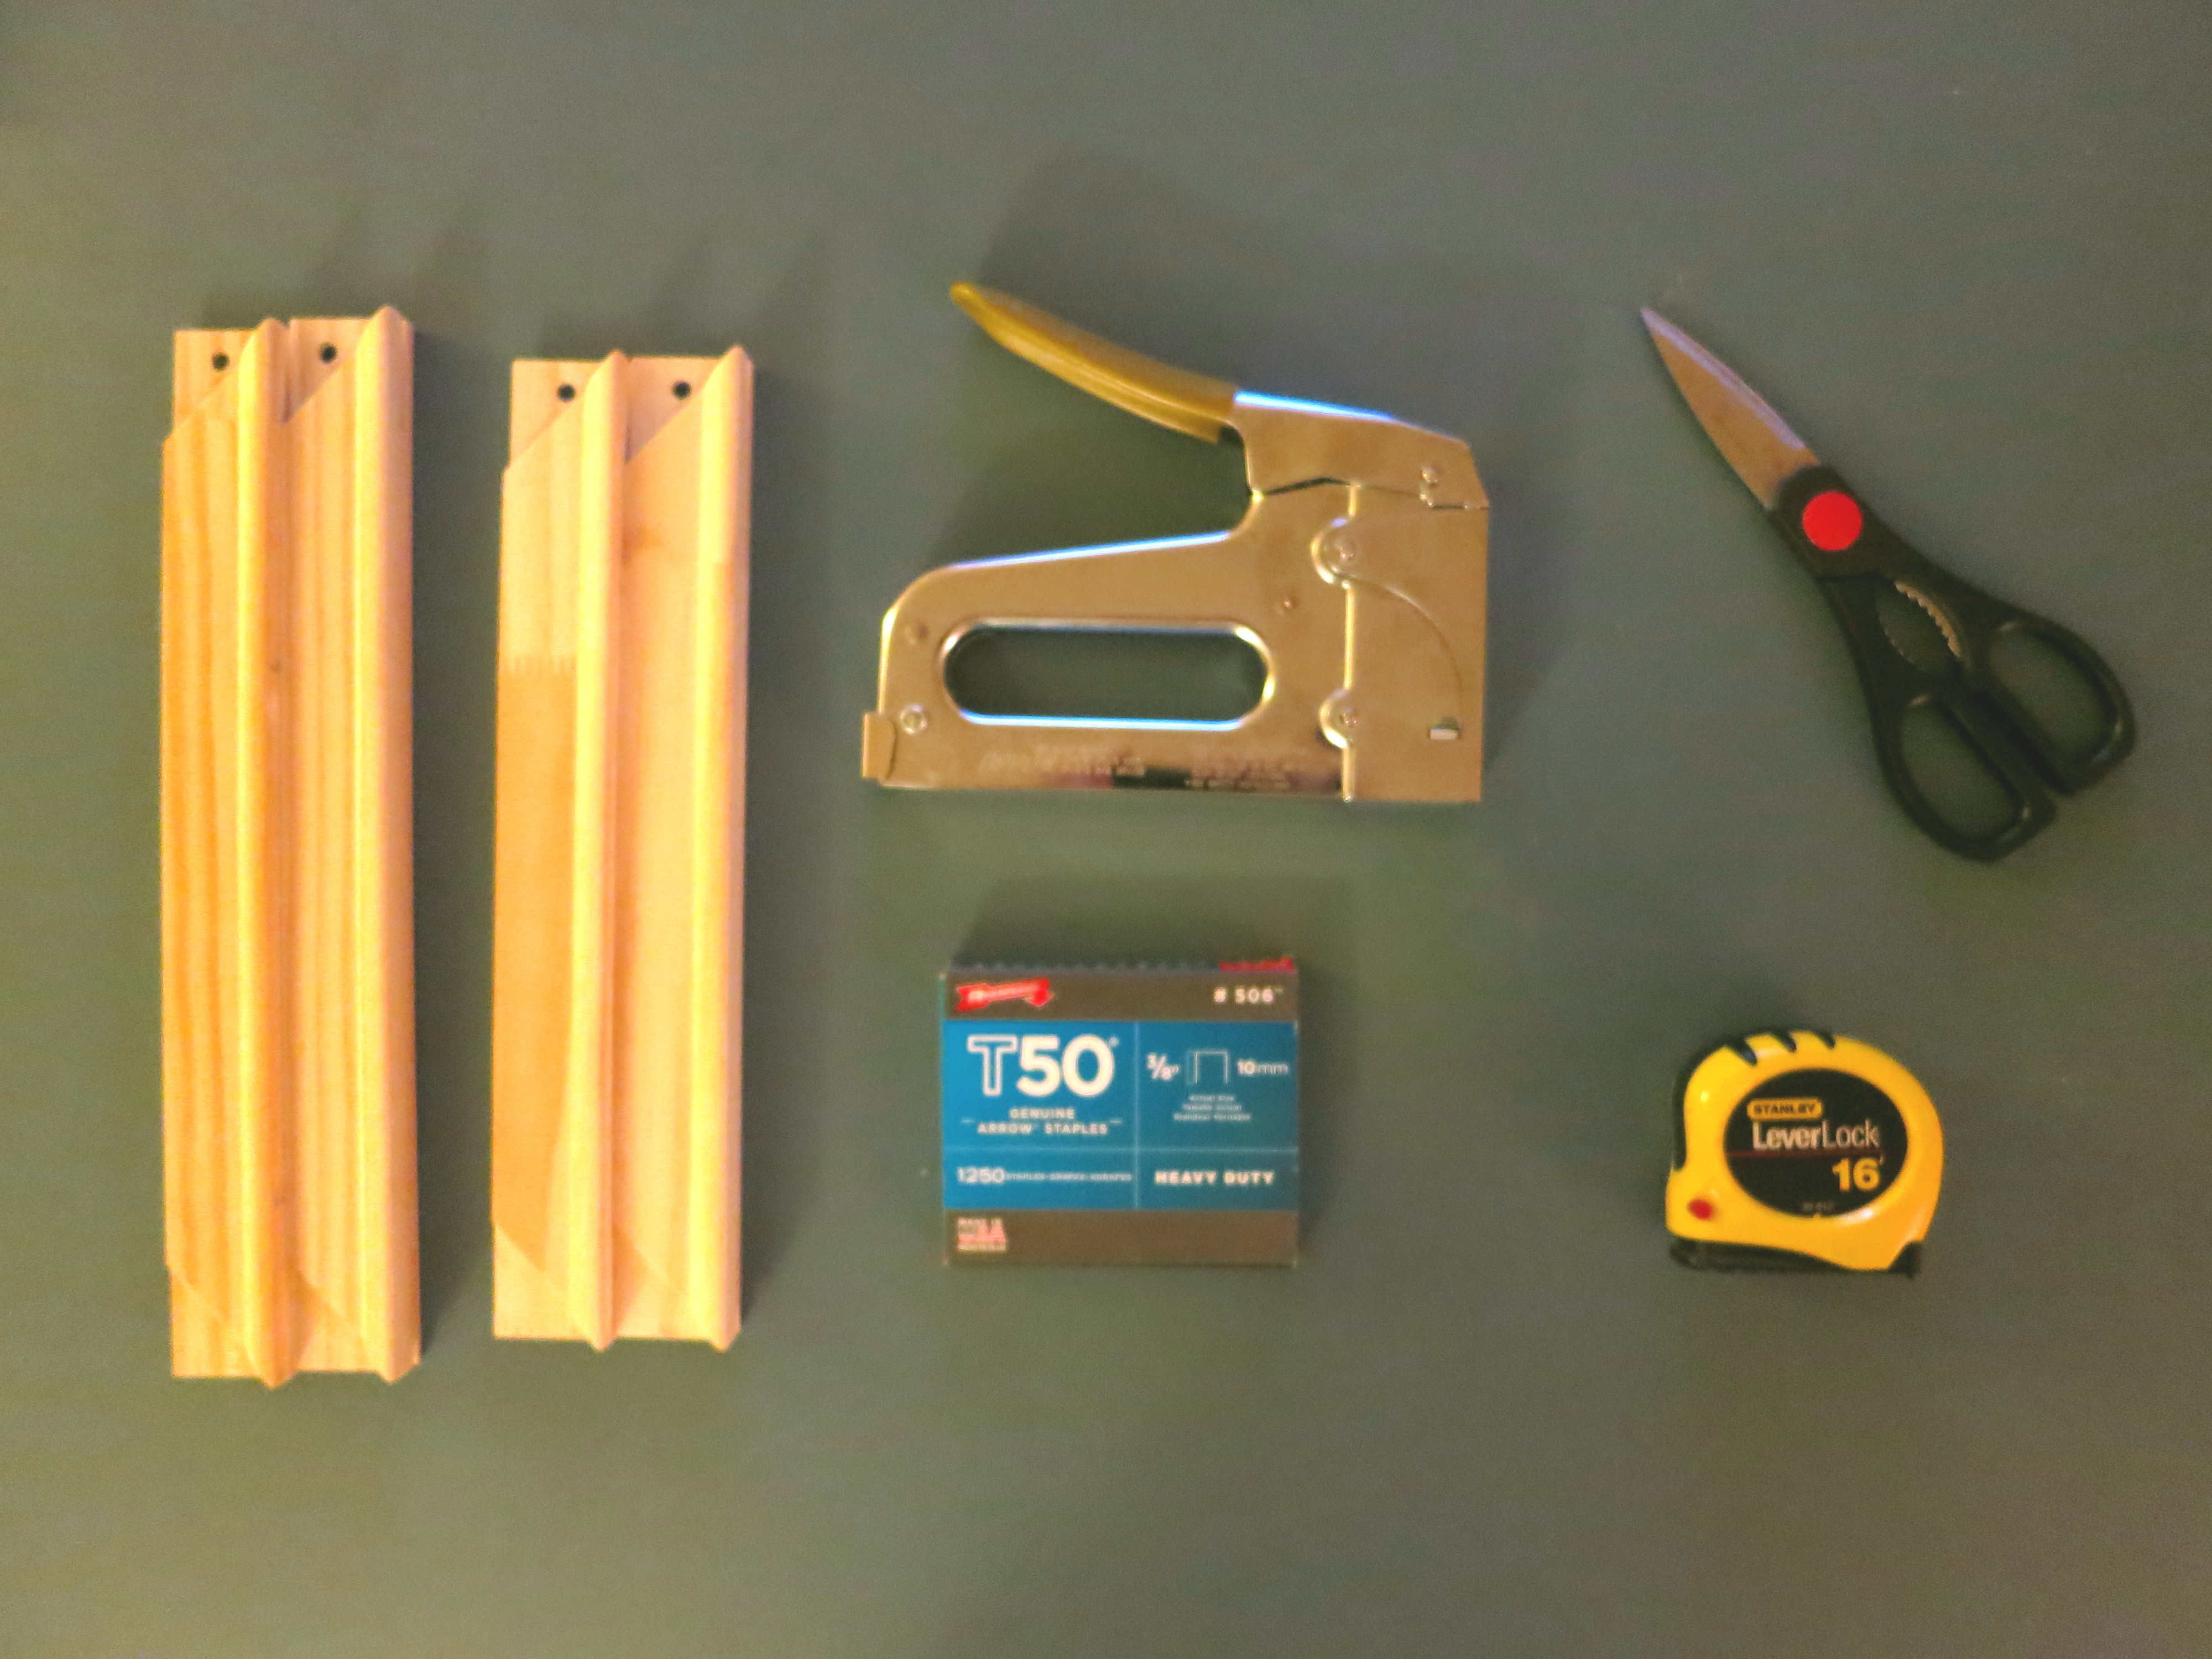
Materials needed:
- 4 canvas stretchers (2 of each required length)
- staple gun
- staples (I use 3/8″)
- scissors
- t-shirt to be framed (obviously 😉 )
Measure the design ahead of time to figure out what size rectangle you’ll need to create. Keep in mind the neck and sleeves of the shirt will limit the amount of border you can have around the design. For this shirt I used 17″ x 14″, so I purchased two canvas stretchers of each length and assembled them together.
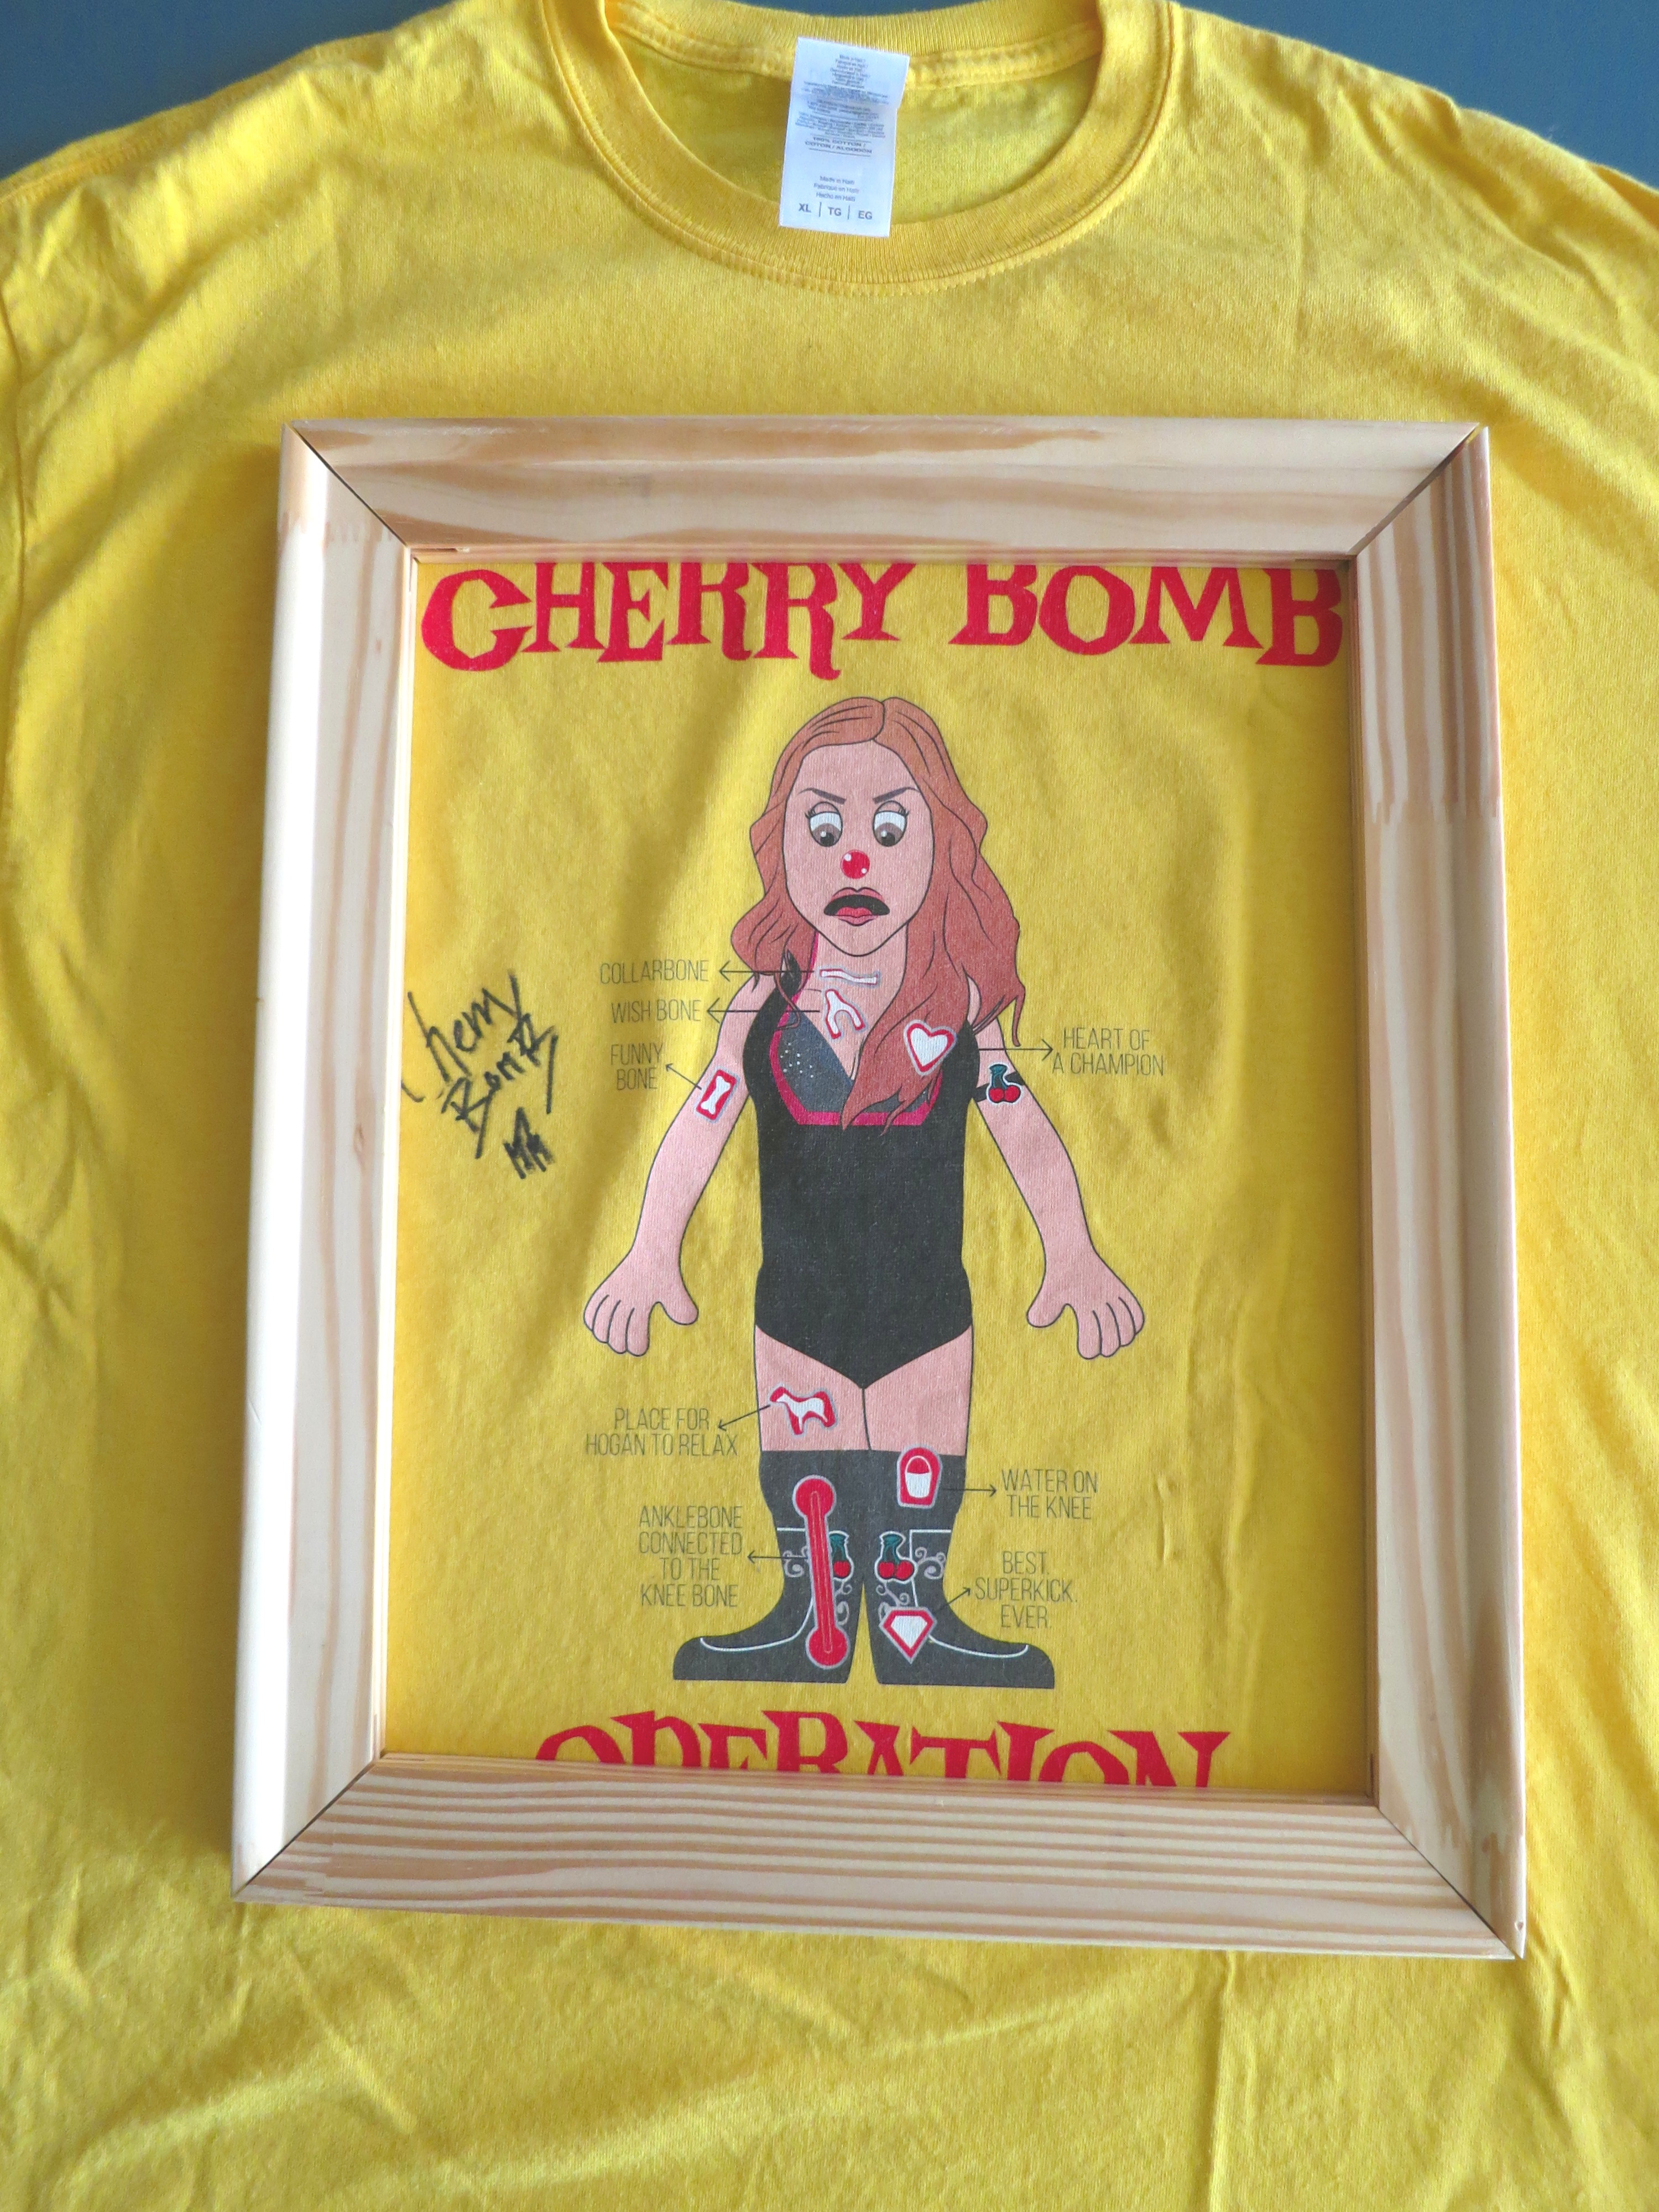
The first pic above is the frame laid over the image, just for reference. Notice it partially covers the image this way, which is fine since the frame is actually placed on the other side of the shirt and the edges of the shirt wrapped around the frame (as shown in the second pic).
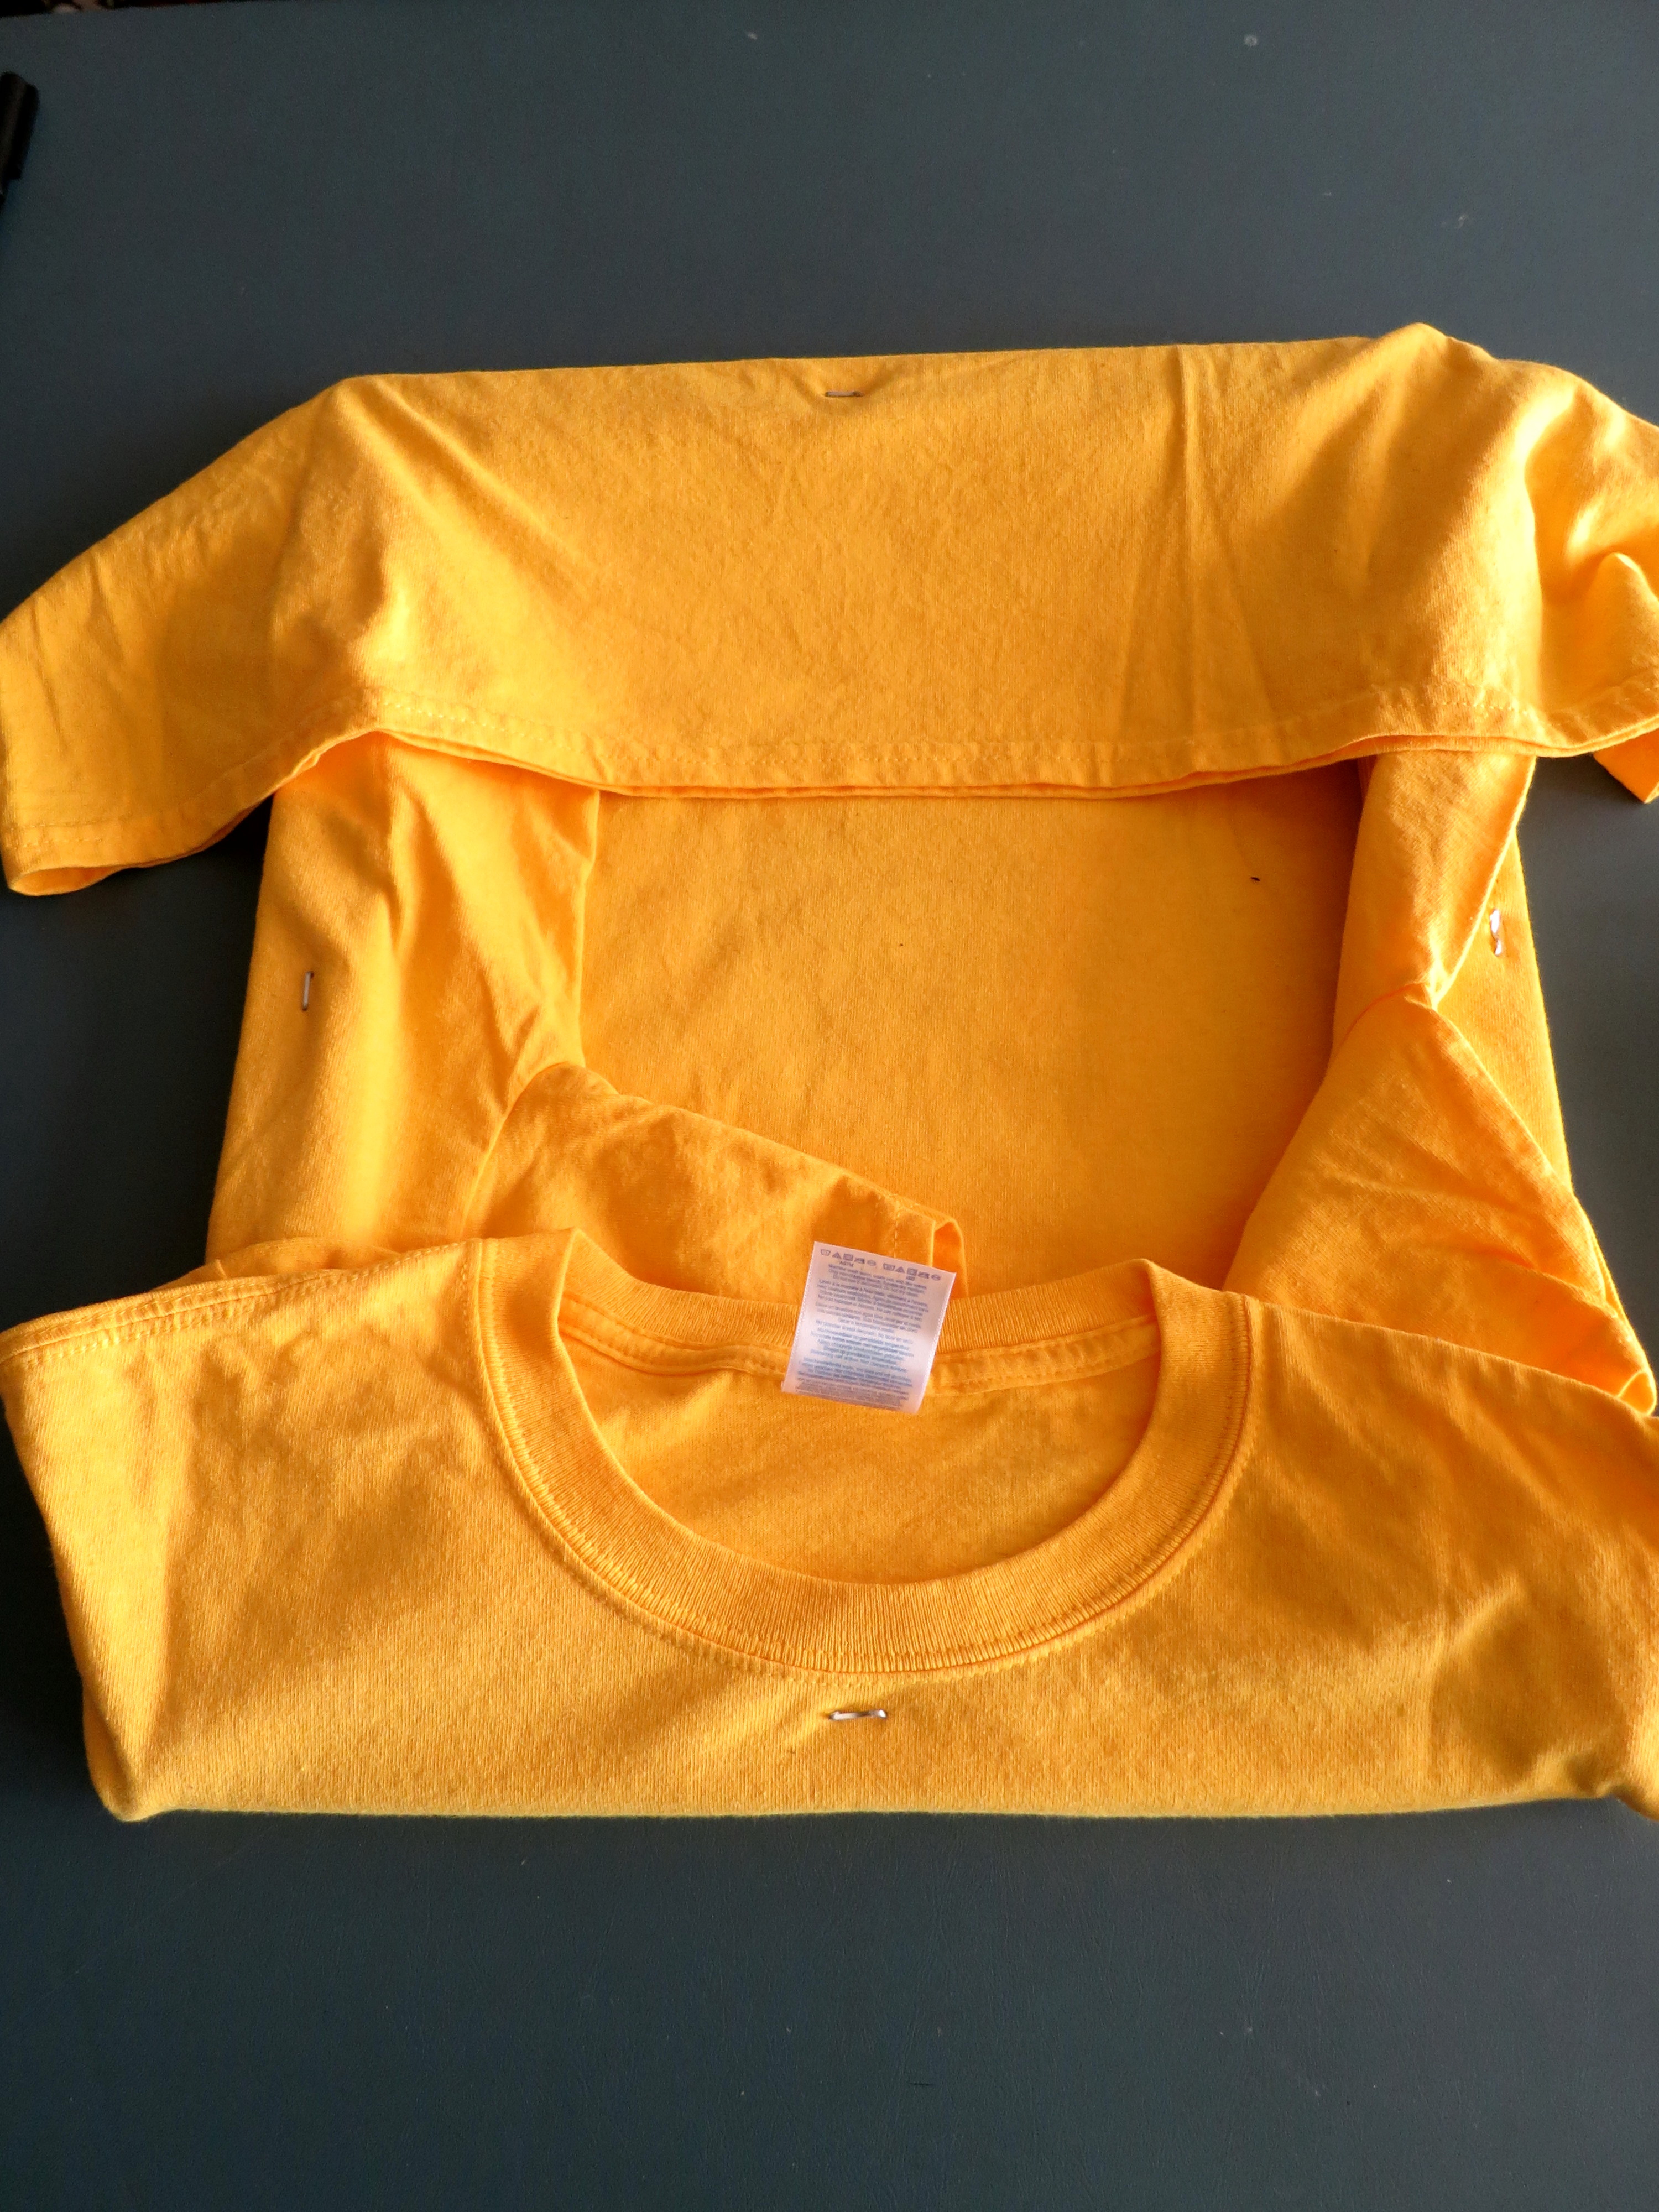
Once the shirt is arranged on the frame to your liking start by stapling the middle of each stretcher. This is to get things in general position and the shirt does not have to be pulled taut here.


The corners are next. Pull on the corner from behind a bit and flip back and forth to the image side to make sure the image is positioned how you want. Pinch the material at the corner and staple either side. Then flatten or fold the pinched material and staple it down.

Once the corners are done the rest is simple, but requires care. Each side needs to be completely stapled down, and this is where the material needs to be pulled taught each time. Be sure to constantly check the image side to be sure you’re not distorting or tilting the image as you do so. This is especially important if the design has straight horizontal or vertical lines – it’s easy to turn them curvy if you’re not careful.


Once all four sides are stapled just cut away the extra material.


And done. Easy way to turned loved shirts into a kind of keepsake, and fun to decorate with. 🙂
The final result:

Thanks for checking this out. Hope it proves helpful.

One reply on ““Framed” T-Shirt Tutorial”
This is a pretty good idea. I am surprised none of those decorating shows or “find treasure at the flea market” type shows haven’t done something like this. Well done.
LikeLiked by 1 person